Techtales.
Command Palette
Search for a command to run...
 🔥 Trending
Handling Authentication with JWT in NextJs
Jul 28, 2024
6 Min Read
 🔥 Trending
Why Serverless is Dying and What's Next
Mar 18, 2026
2 Min Read
 🔥 Trending
Why My Opinion on NextJS is Changing
Jul 21, 2024
2 Min Read
 🔥 Trending
How to Write Clean Code – Ten Tips and Best Practices
Oct 24, 2024
6 Min Read
 🔥 Trending
Exploring useSyncExternalStore, a Lesser Known React Hook
Apr 8, 2026
7 Min Read
 🔥 Trending
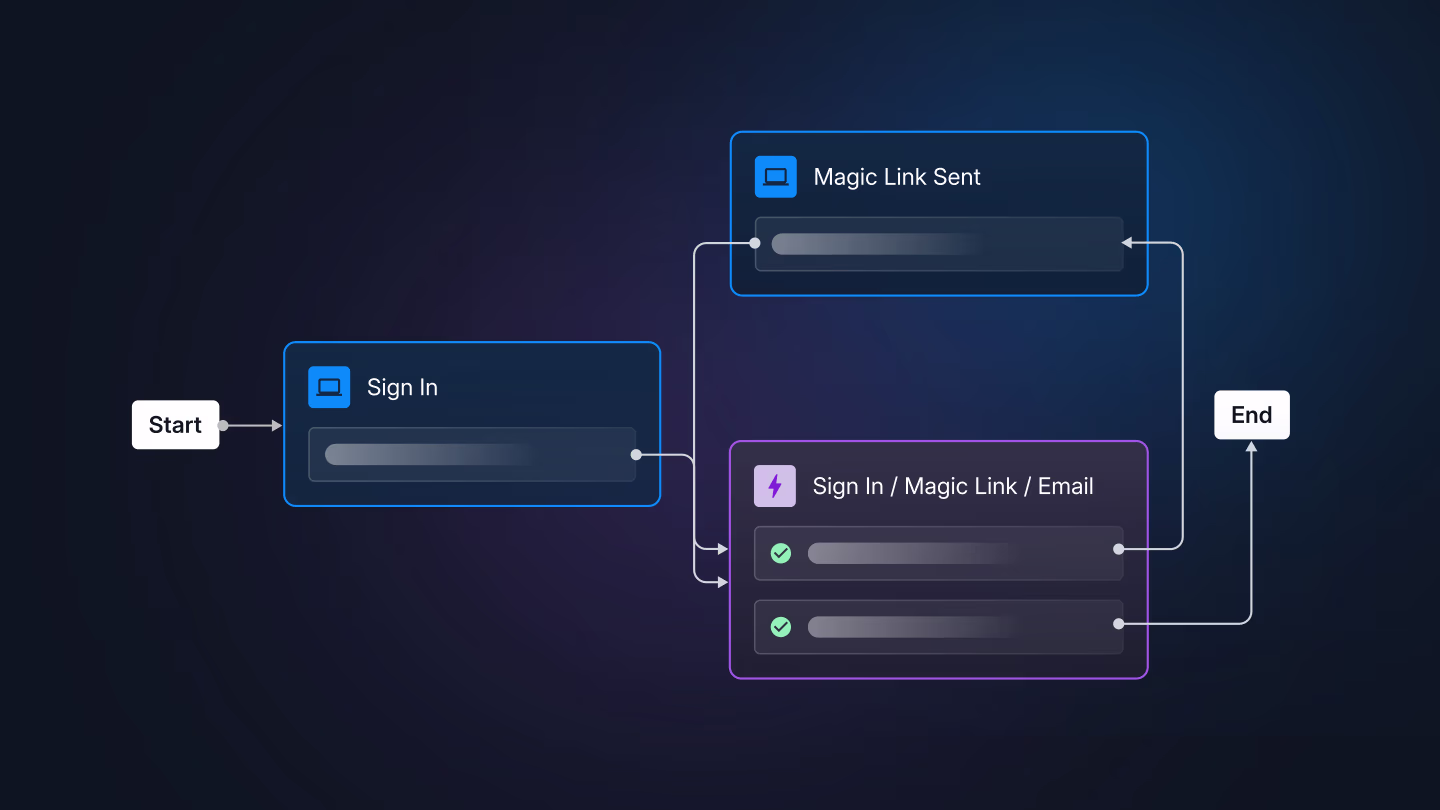
How to Implement Magic Link Login in NextJS
Mar 8, 2026
7 Min Read
 🔥 Trending
Authentication in NextJS Part 2: Implementing SSO Login and Registration
Dec 9, 2024
6 Min Read
 🔥 Trending
Free Resources For Web Developers
Oct 29, 2024
2 Min Read
 🔥 Trending
A Beginner's Guide to Typescript for JavaScript Developers
Sep 21, 2024
5 Min Read
 🔥 Trending
AI and the Law in 2025: What is Going On?
Aug 19, 2025
4 Min Read
TD
The Don
Apr 8, 2026
7 Min Read
Exploring useSyncExternalStore, a Lesser Known React Hook

TD
The Don
Apr 5, 2026
5 Min Read
A Quick Introduction to Rust
TD
The Don
Apr 5, 2026
4 Min Read
Tauri: The Good, the Bad and the Ugly

TD
The Don
Apr 3, 2026
3 Min Read
The State of Tech Jobs in 2026

TD
The Don
Apr 3, 2026
6 Min Read
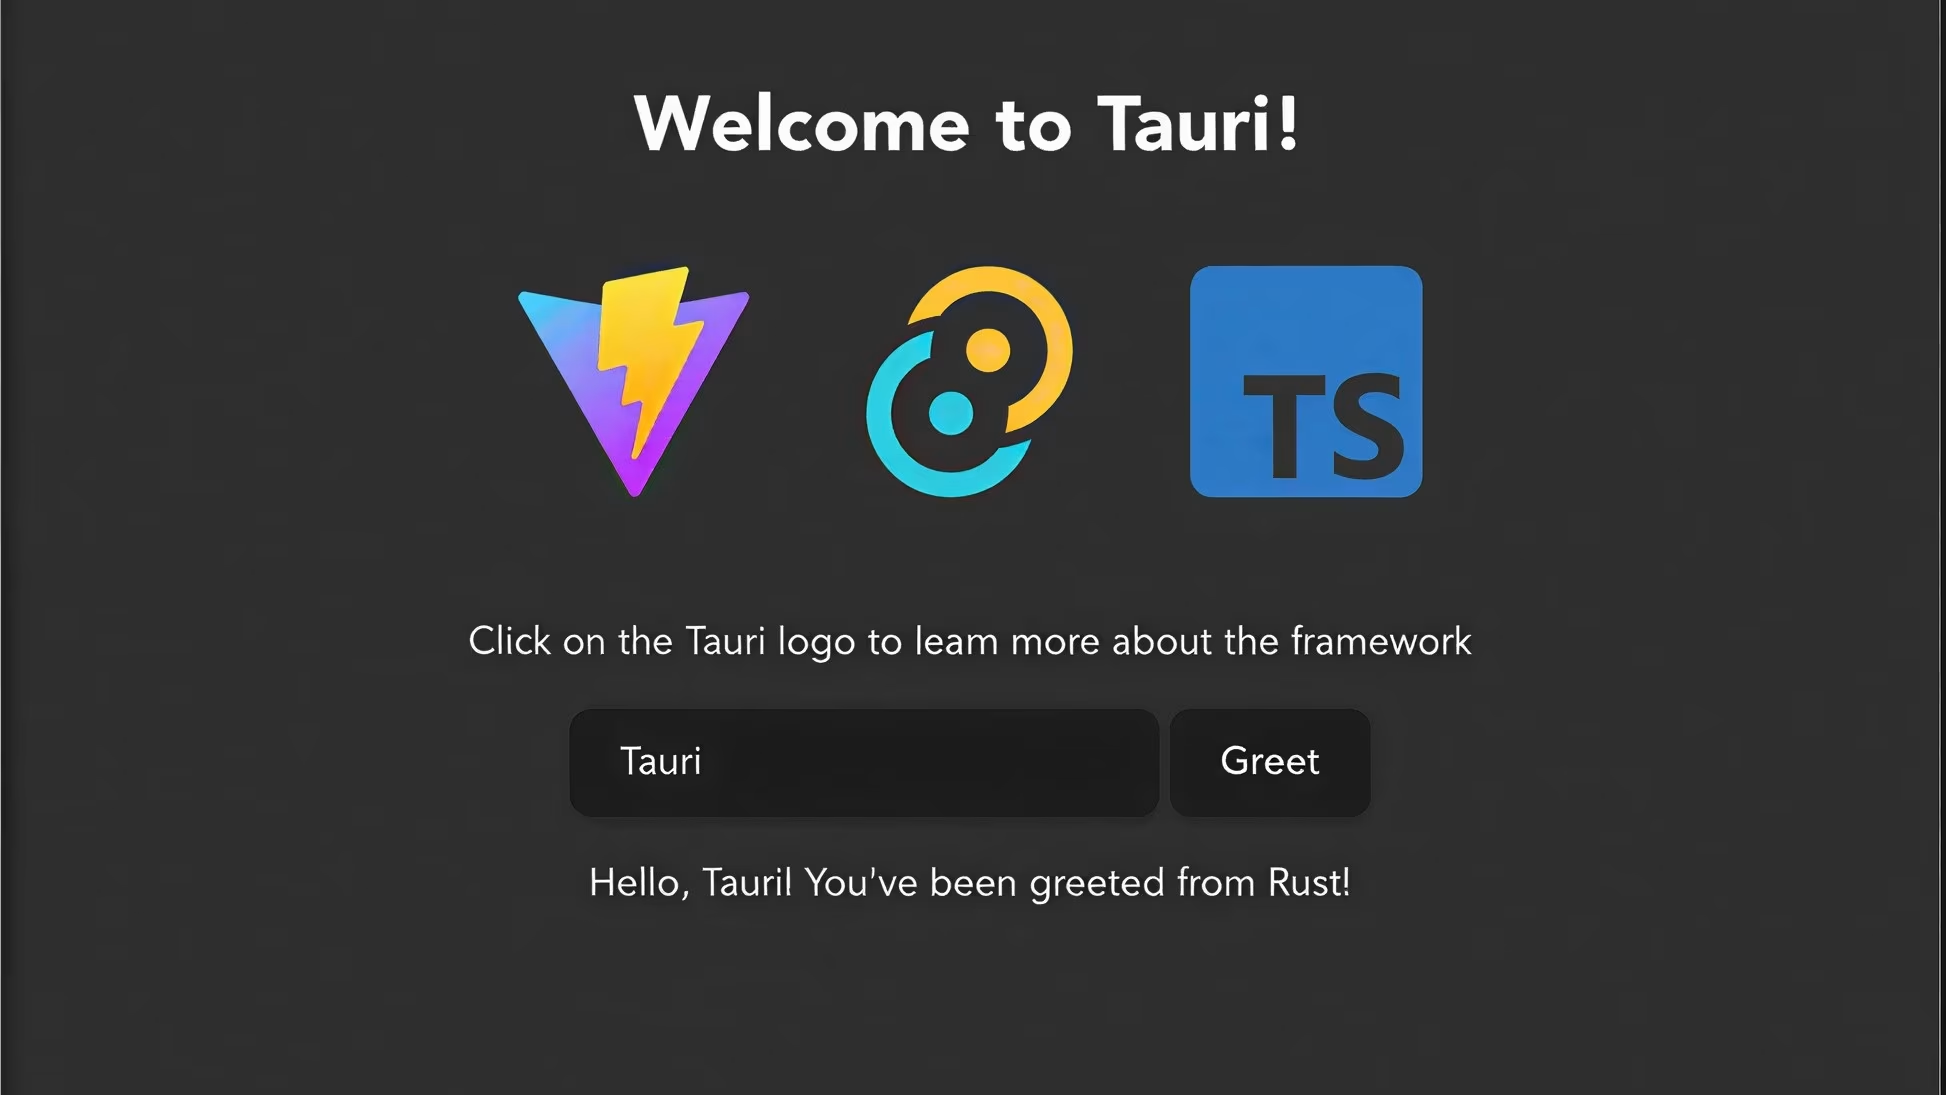
How I Built My First Desktop App with Tauri - Tutorial

TW
Tech Wizard
Mar 30, 2026
6 Min Read
What is Load Testing?

dd
diamond degesh
Mar 24, 2026
6 Min Read
Less Common HTML Tags You Should Know

TW
Tech Wizard
Mar 20, 2026
4 Min Read
JWE vs JWT: Key Differences, Use Cases, and Security Tips
TD
The Don
Mar 18, 2026
2 Min Read
Why Serverless is Dying and What's Next

TD
The Don
Mar 17, 2026
4 Min Read
Rate Limiting Server Actions in NextJS

TD
The Don
Mar 16, 2026
5 Min Read
How to Install and Set Up Prisma ORM Version 7 in Next.js

TW
Tech Wizard
Mar 14, 2026
4 Min Read
8 Reasons Better Auth is the Ultimate Authentication Solution

TD
The Don
Mar 12, 2026
3 Min Read
React Router vs Tanstack Router: Which one wins?
TW
Tech Wizard
Mar 8, 2026
7 Min Read
How to Implement Magic Link Login in NextJS

TW
Tech Wizard
The uncomfortable truth about vibe coding
Stay Updated with Techtales
Get the latest articles, tutorials, and tech insights delivered straight to your inbox. Join over 10,000 developers who trust TechTales for quality content.
By subscribing you agree to our terms and conditions. We value your privacy and we will never spam you or sell your information.